Bites to Warm the Soul: Gut-Friendly Recipes

RECIPES / ANNE-ASHLEY BLACK
Hi! My name is Anne-Ashley Black and I am a Speech-Language Pathology graduate student by day and health conscious cook by night. My love for cooking began at an early age. My favorite place to be was beside my grandmother who we call “Honey” in the kitchen. I have always loved creating or altering recipes to make them healthier without compromising flavor.
In the summer of 2018 I started having throat issues. It felt like something small was stuck in my throat. All of my research led me to think it was potentially acid reflux but I was not having the classic symptoms that reflux presents. I was not eating spicy food, I did not have heartburn, I didn’t regurgitate my meals, and the only presenting issue that I had at the time was a lump in my throat. I went to the doctor who confirmed it was acid reflux by my presenting symptoms and prescribed me one of the most overly prescribed medications- a PPI. The technical term for a PPI is proton-pump inhibitor which suppresses the amount of stomach acid you create. This set me off on a journey of healing as the PPI depleted my stomach and increased my acid reflux problems which contributed to me getting chronic gastritis. I was unable to digest my food properly and stomach was in distress.
After researching on my own and finding a natural minded doctor, I have been able to begin healing and find relief. Some common foods that people who have acid reflux should avoid are: chocolate, garlic, onion, spicy food, tomatoes, citrus, peppermint, fatty/fried foods, pepper and more. I have found that gluten, dairy, and eggs also irritate my stomach so I have chosen to remove those as well. I found it very difficult to find recipes and resources that do not have these ingredients. I decided to take recipes and try to convert them to be acid-reflux-friendly and post them on my cooking blog to hopefully provide a resource for any individual struggling to eat with acid reflux. I based the way that I eat off the acid watcher diet by Dr. Jonathan Aviv and it was fundamental in controlling my reflux with my diet and in helping me decide which foods were safe to eat and which foods were off limits.
Digestive issues are so common in our country and have become a hot topic on popular health and wellness websites. I wanted to share a few gut-friendly recipes with you as we gear up for the holiday season. These recipes have been a hit with friends and family and are very easy to make. You can rest assured that no one will know that you brought a healthy alternative that won’t give anyone digestive issues for the potluck this year! As Hippocrates once said “let food be thy medicine and medicine be thy food.” You can heal from chronic illness by changing your diet. Educating others on alternative options to heal from digestive distress has become a passion of mine and I am so excited that I get to share a little bit of what I cook in my kitchen with you!
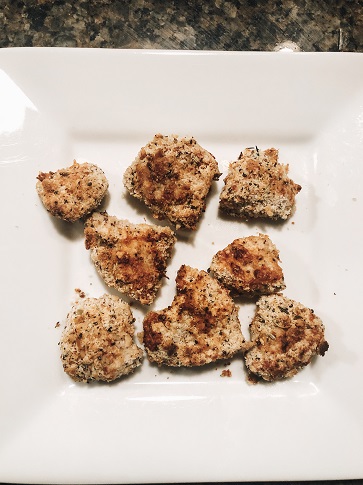
Air Fried Chicken Nuggets

Ingredients:
Chicken
- 1 pound of chicken tenderloins cut into bite size pieces
- 1 TBSP of avocado or olive oil
- ¼ tsp of salt
Breading
- ½ cup of almond flour
- ⅛ cup of chickpea bread crumbs or GF panko (you can buy the chickpea crumbs at whole foods)
- 1 tsp of italian seasoning
- ½ tsp of fennel seeds
- ½ tsp of chia seeds (optional)
- 1 tsp of ground flax seed (optional)
- ½ tsp of paprika
Directions:
- Chop each chicken tenderloin into thirds. Pat dry the pieces with a paper towel.
- Toss the chicken pieces in olive oil and salt and set aside while you prepare the breading.
- Combine all the ingredients for the breading (almond flour, chickpea crumbs, Italian seasoning, fennel seed, chia seeds, ground flax seeds, and paprika on a plate and pat down the mixture until it is even.
- One by one coat each piece of chicken in the mixture and set into a single layer in your air fryer.
- Cook on 390 degrees for 15-18 minutes flipping half-way.
- I have found that some air fryers cook differently and yours might need more or less heat and more or less time depending. The first time you make it might be a trial but you will get the hang of how your air fryer cooks chicken!
- This recipe is a weekly staple in my house. I love adding in the chia and flax because I am sneaking in superfoods and that makes me so happy.
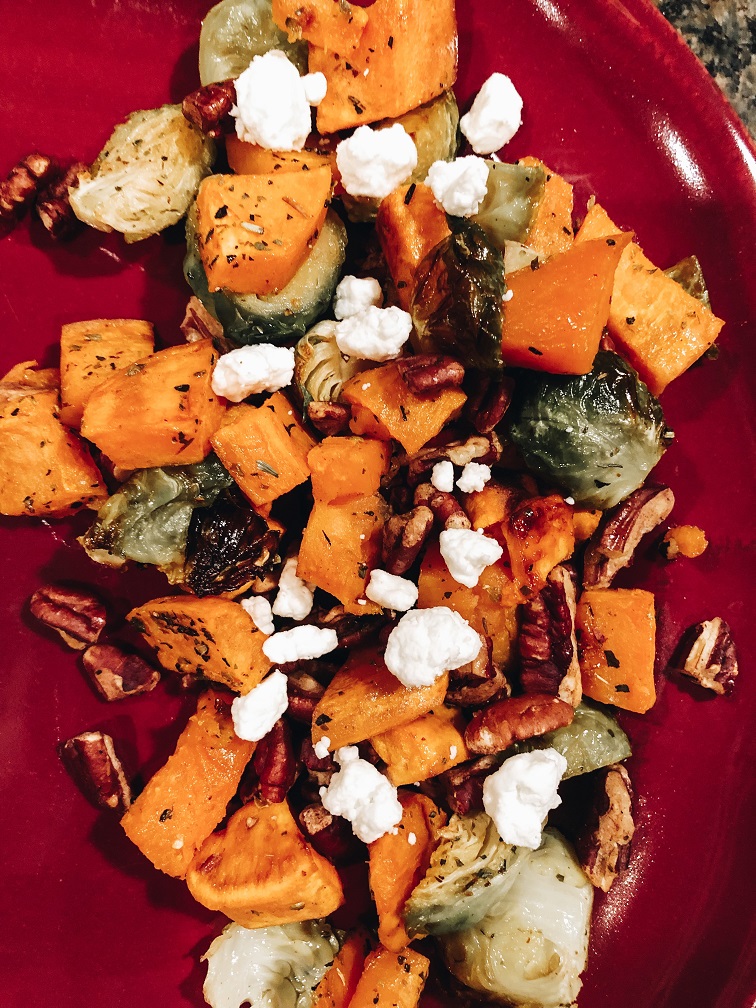
Sheet Pan Maple Roasted Veggies with Pecans and Goat Cheese

Ingredients:
- 1 pound of brussel sprouts washed and halved
- 2 pounds of butternut squash or sweet potatoes peeled and cubed*
- 2 tablespoons of olive oil
- 1 TBSP of pure maple syrup (not pancake syrup)
- ½ cup of chopped pecans (added in at the end once they have been roasted)
- Goat cheese for topping
- Salt to taste
Directions:
- Preheat the oven to 400 degrees
- Wash and chop all the vegetables and place on a large sheet pan lined with parchment paper
- Toss the vegetables in the olive oil, maple syrup, and salt. Make sure everything is evenly coated.
- Place in the oven and roast for 30-45 minutes and watch for browning. Ovens differ in heat so make you you toss halfway through to ensure that all sides get roasted. You don’t want the vegetables to burn so just keep an eye on it.
- Once the veggies and the pecans have been roasted place the veggies and roasted pecans together in a large dish. Add maple syrup to taste if you want it sweeter. Top with goat cheese and serve.
Toasting the pecans:
Place pecans on a baking sheet and toss in ½ tsp of olive oil and salt.
Roast at 300 degrees for 10-15 minutes.
Once they are roasted set aside.
Vegan and Gluten-Free Cinnamon Apple Crisp

Ingredients:
Apple Filling
- 5-7 apples peeled and cored
- I used a mixture of Granny Smith and Honey-crisp washed, sliced into 1/4 inch thick slices and peel removed if you don’t like it. I used and apple slicer to cut up my apples. Then using a paring knife, I removed the peel and halved that slice.
- 1/3 cup of pure maple syrup
- 1/4 apple juice (if not watching reflux you could use bourbon)
- 2 tsp of arrowroot starch OR 1 TBSP of cornstarch
- I used arrowroot starch because it is what I primarily use in replace of cornstarch
- 1/2 tsp of cinnamon
- 1/4 tsp of nutmeg
Ingredients:
Crumble Topping
- 1 cup of certified USDA Organic and Gluten-Free Old Fashioned Oats (Non-GF oats are fine if you aren’t GF)
- 1/2 cup of firmly packed Blanched Almond Flour
- 1/2 cup of chopped pecans (add more if you’d like)
- 1/3 cup of firmly packed coconut sugar or Brown sugar
- I prefer coconut sugar because it is healthier
- 1/4 tsp of salt
- 4 tbsp of coconut oil
- 1/4 cup of Non-dairy yogurt or plain yogurt if not DF (I used Culina)
- 1 tsp of vanilla
- 1/8 cup of maple syrup
- I used Nadamoo Vanilla Ice Cream for the topping
Directions for the apple filling:
- Preheat the oven to 350 degrees
- Place the apples in a 9-inch baking dish. In a separate bowl mix together the apple filling mix (apple juice, maple syrup) mix well then add (arrowroot, cinnamon and nutmeg) whisk until combined everything is combined. Pour your mixture evenly over your apples to coat. Then toss the apples in the mixture.
- Bake for 20 minutes.
- While the apples are baking go ahead and assemble the crumble for the topping.
Directions for crumble:
- In a bowl combine your oats, almond flour, coconut sugar, pecans, salt, pure maple syrup, vanilla, melted coconut oil, and yogurt! Mix well. Add more oats if needed (I just like a lot of crumble!)
- When the apples have finished baking remove them from the oven and toss them again.
- Now it’s time for the crumble— place spoonfuls of apple crumble on the baked apples. Don’t worry about packing it down.
- Bake the apple crisp uncovered for 20-25 minutes and then test the apples. If you need more time to make the apples soft- cover with foil and bake an additional 5-7 minutes. You want the crisp to be bubbling on the sides.
- Remove from oven and wait about 5-10 minutes before serving.
- Top with dairy-free ice cream or yogurt
Multipurpose Cashew Cream Sauce

STEP ONE: THE SOAK
Ingredients:
1 cup of boiling water
1 cup of raw cashews
Directions:
Place 1 cup of cashews in a bowl and pour one cup of boiling water over the cashews and soak for 45 minutes to an hour. (If you are really in a pinch, 30 minutes will do just fine)
STEP TWO: BLEND IT ON UP
Ingredients:
- 1 cup of soaked raw cashews- RINSED & DRAINED
- 1 cup of chicken or vegetable stock
- 1 TBSP of Italian seasoning
- Salt to taste- this is super important-salt is a major player in the recipe.
- Sumac- add in sumac to mimic the flavor of lemon which helps give the sauce almost an alfredo-like taste. You can find sumac at the Fresh Market in the spice section.
- If you aren’t watching your acidity then go on and add some good ole fashioned lemon juice.
Directions:
- Place cashews and 1 cup of stock in a high speed blender.
- Blend on high for 45 seconds to a minute. You do not want the mixture super runny. You want it a bit thick.
- Transfer mixture to a bowl and add salt and Italian seasoning.
- Use this sauce on top of rice, pasta, and chicken! It is SO good… Heck, I’d even put it over mashed potatoes!


Comments